Friday, February 28, 2014

Weekly update.

Alright, this is what I have done this week. Last week I was finishing up the UVs for the suicidal Furby gun. I finished them, but somehow lost that work and had to redo a portion of them this week. The UVs for that gun are completely done and ready to texture.


The UV picture is coming out blurry for some reason. You can get the point, though. The big object to the top right is my easy button. I made it bigger because I am planning on putting some decent detail into it.

Next I moved onto my Nail Gun. I had the Furby gun modeled and UV'd for the most part and I needed my nail gun to catch up. I spent a lot of time this week on modeling, UVing and even started to texture it a bit. I had a problem early on of weight distribution being a problem. Frank helped me with equaling out the weight to make it look balanced.


I got the UVs done. 


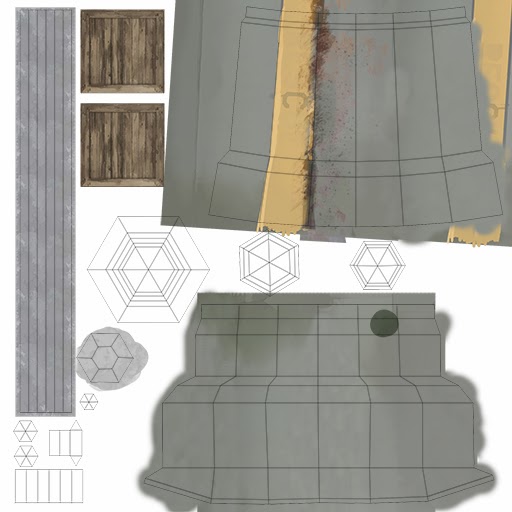
My diffuse map. I've been playing around with different color patterns trying to make it look cartoony, but realistic at the same time.


I was also playing around with adding rust, dirt and overall nasty stuff to it. I just added this layer of stuff towards the end of my work tonight. This blog was due in about an hour and I had been working on it for the majority of the day, so I decided to call it for the night. I want to add that same yellow stripe to the other side of the gun as well. I want to add the grime to patchy areas of the gun that make sense. I really want to get into the crevices more and give it a worn look (more on that later).  


Overall render of the gun so far. I haven't adjusted anything in Photoshop, yet. I am still going to tweak the levels and give it a more darker contrasty feel. This is color only with minimal change to the spec options (no spec map yet). I plan on adding some rivets to the sides and using normal and bump maps to make them "bump." 

The crate will also have a decal on the left side that has some kind of funny picture (logo) of a guy and rail road spikes. It'll also be on the right side of the crate as well. I just haven't came up with the logo yet.

I'm also considering dropping my go-cart project, with Frank's approval, and really getting into the texturing of this and the suicidal furby gun. I am having more fun with texturing than modeling at the moment (I am doing a lot of modeling in other classes and getting burnt on it). I am really interested in learning to use dDo better. I was watching a video on how a guy was texturing a chainsaw and it's interesting. I've never messed with dDo, but I think this would be the perfect project to get into it. I'll talk to Frank about it on Monday.


Friday, February 21, 2014

Weekly update.

Here are two images of the Suicidal Furby gun:


It was fully UVd, but my last save didn't make it to my flash drive and probably got deleted off of the school computers. I just have to go back and UV the scope and handle. It's coming along nicely. I'm excited to start texturing it. I'll have the texturing done by Thursday.

Here are two images of my Nail Gun:


Still have a little left to model on this one. I am going for a cartoony vibe on this as well. The box will be a crate that is being held together by duct tape. Rusty train spikes will be sticking out (probably alpha cards). There will be a hose/tube underneath the main turret part that is sucking nails up into the gun. I'll try to have this UVd and ready to texture by Friday. That'll give me a few weeks to model and texture my cart.

Friday, February 14, 2014

I ran into problems this week. Mostly due to other classes requiring my time, but I also ran into a problem when it came to modeling. I'm having a tough time getting the model to look good at 500 tris. These are portfolio pieces, so I want them to look good. The main problem I am having right is the structure of the suicidal furby gun.

Excuse the concept art. I was working off of a sawed off shotgun look. The idea is to have the bottom front part be a tube that holds the furby's. It would work as a ammo cartridge. The first problem I am running into is for the gun to be "practical" (I use that lightly because it's shooting suicidal furbys) that whole front assembly would have to be one tube. That way the furby would go from the chamber on the bottom to the top barrel part. When I do this, I go way over my 500 tri limit and it leaves me no room to adjust the handle or even had the trigger. My new step is to lower the quality of the cylinder and see if I can make it look good while still hitting my 500 tri limit. The idea still works the same; I am going to paint the furbys on the camber and give it a stylized look.

Frank, I know it doesn't look like I've put that much time into it, but I have. I've thought about the practicality of the a bit and even modeled out a few pieces that I've since deleted. I may bug you on Monday or Tuesday for some help on this if I cannot get it going over the weekend.

Quick note about the second gun. It's the nail shooter. I am going to scrap the idea of dual-cannons and just go with a singular cannon with three barrels. Less tris, leaving me more to add some detail.

Friday, February 7, 2014

Not as much progress as I would have liked this week. I made some important decisions, but it doesn't look like that much work. I originally was going to go with a more realistic look on my textures for this project, but after working on a video game from another class that uses a stylized art style, I've decided that will be the approach that I use for this project.

The textures will be hand drawn and have a more cartoony look them. I've been thinking about asking Frank if it'll be worth it to try modeling and texturing more game assets with the same style. It would be good practice for the other game I've been working on.

Better updates next week. I'm going to try and get the models up.